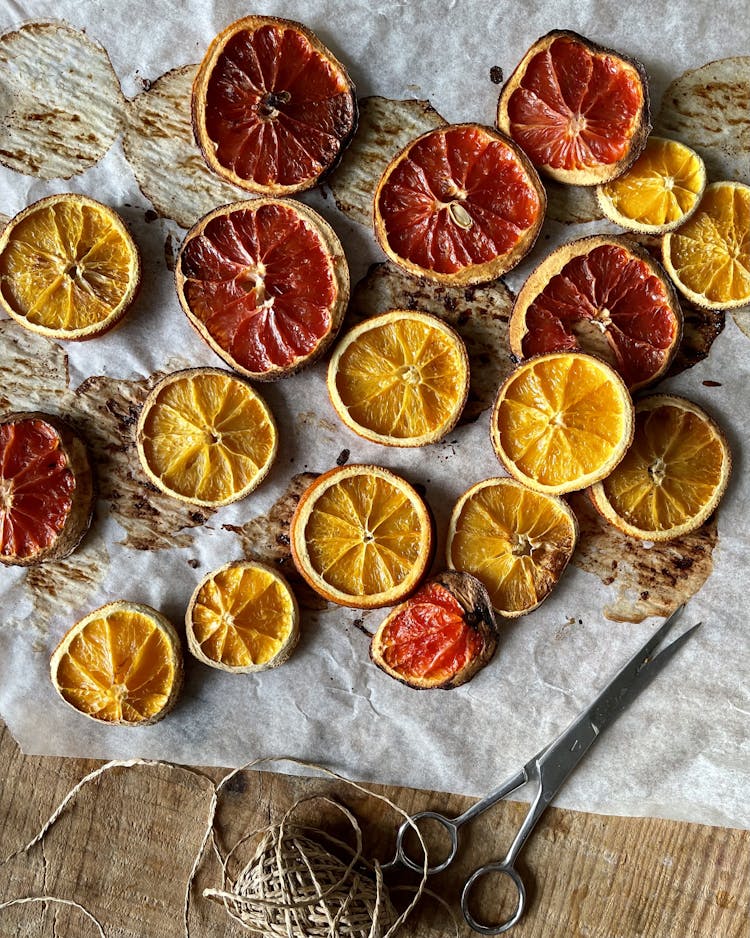
How To Make Dried Orange Christmas Decorations
Using slices of oranges as Christmas decorations will bring a warm and festive touch to any home, plus it's a great alternative to plastic decorations.

Follow these directions and ideas for any citrus fruits you have – you can even use apples for your Christmas dried fruit decorations. Or what about cute dried lime slices hanging from the tree, or a bright wreath packed full of lemon slices?
What You’ll Need:
- Oranges/limes/lemons/grapefruit/apples
- Serrated knife e.g. a bread knife or steak knife
- Paper towel
- Wire rack or parchment paper
How To Make Dried Orange Slices
Step 1 – Slice the oranges
Preheat your oven to 100 degrees C.
Using your serrated knife, slice the oranges through at around 1 cm thickness. You can cut very thin slices if you’d prefer – using a mandoline is ideal for this.
You’ll need to bake your orange slices in a single layer, so make sure you have enough wire racks or surface area in your oven to fit them.
Step 2 – Remove excess moisture
Grab a paper towel and dab your orange slices on both sides to soak up extra moisture. They should be as dry as possible before you place them in the oven, to significantly cut down baking time.
Step 3 – Bake the orange slices
Place the wire rack over the parchment paper in the oven. Lay out your orange slices in a single layer on the wire rack. Placing them directly onto paper or a baking tray can cause them to stick or take longer to dry.
Bake the orange slices in the oven for 2-3 hours. If you cut thicker slices, you’ll need to allow longer than this – up to 6 hours.
Turn them every 30 minutes to thoroughly dry them. If you don’t, you may end up with uneven colour, moist patches or even burnt areas.
Step 4 – Take them out of the oven
Your orange slices are usually done once they become translucent, resembling a stained glass window. Leave them to cool.
If you’d prefer a lighter orange shade, you can take the slices out sooner. But be aware they’ll still be sticky and may develop mould over time. Properly dehydrated orange slices will last for about 2 years.
The orange slices will continue to dry out over the next month or longer.
Decorations To Make With Your Orange Slices
Now you have your dried orange slices, how will you use them? Here are a few ideas for your dried orange decorations.
Festive Wreath
You’ll need:
- Orange slices
- The wreath frame structure – interwoven twine, shaped branches or a metal ring (for a minimalist look)
- Glue gun
- String or twine
- Other ornaments – e.g. cinnamon sticks, dried nutmeg, pine needles, pine cones, berries, dried bay leaves, poinsettia heads
Arrange your ornaments around your wreath frame before glueing anything down. Add a dab of glue onto the white pith edge of each orange slice where it’ll meet the frame. This will provide a flatter surface for the glue to cover. Firmly press the orange slice to the wreath for 5 seconds.
Orange slices look beautiful as the main feature on your wreath. To do this, glue them onto the wreath first. Then embellish each slice with your leaves or other ornaments.
Tree Ornaments
You’ll need:
- Orange slices
- Glue gun
- Scissors
- String, twine or ribbon
- Skewer or small knife
Cut lengths of 4-6 inches of string – whichever length you want your ornament to hang at. Tie or glue the ends together.
Now, you can either:
- make a hole in the flesh near the top of your orange slice, and thread the string through, or
- simply glue the string loop to the orange slice
Dried Orange Garland
You’ll need:
- Orange slices
- Drill and small drill bit
- Thick needle
- Scissors
- String, twine or ribbon
- Ornaments you can drill through – e.g. cinnamon sticks, dried nutmeg, pine cones, large dried bay leaves
Cut your string to the desired length for your garland.
Drill holes through the centres of your ornaments. Using the needle, thread your string through the ornaments, in the order you want them to display. A repeating pattern with more greenery and a few large ornaments often looks the best for festive orange slice decorations.
Firmly tie the two ends of the string together.
Need More Low-Waste Festive Ideas?
We've got a bunch of ideas!

8 Useful Tips For A Zero-Waste Festive Season
You needn’t miss out on the festivities while cutting down your consumption. Here are some ideas for how to have a zero-waste festive season.

DIY Christmas: how to make decorations and gifts
If you’ve read our beginner’s guide to upcycling already, you may already be well on the way to making your own scented candles and turning unwanted clothes into vibrant cushion covers. Here are more crafty decoration and gift ideas for Christmas that will get you upcycling household items and cutting down on plastic and waste.

How to plan a zero waste Christmas meal
You've finally got this food waste thing cracked. You plan your meals for the week to make sure you'll cook with every vegetable. You resist special offers in the supermarket that encourage you to buy too much. Monday and Thursday dinners are now "leftovers nights".

