Everything You Need To Know About Your Food Waste Bin
Here's everything you need to know about your food waste bin, from usage and maintenance to tips for keeping it clean and pest-free.

What Bin Does Food Waste Go In?
In the UK, food waste should be placed in the designated food waste bin or caddy provided by your local council. This bin is specifically for compostable kitchen scraps and leftovers. Separating food waste from other rubbish helps in recycling efforts and supports environmental sustainability.
What Can You Put In Your Food Waste Bin?
Being careful about what you put in your food waste bin helps with efficient composting and prevents contamination. Proper disposal also keeps pests away and ensures you follow local regulations, contributing to a healthier environment and better waste management.
What You Can Put in a Food Waste Bin:
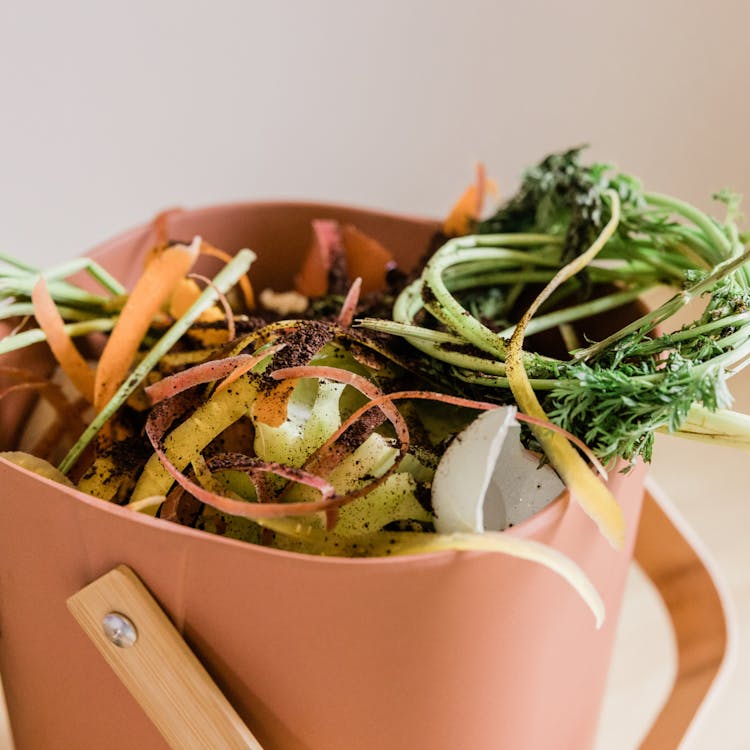
Fruit and Vegetable Peelings: All types of fruit and vegetable scraps, including cores, skins, and peels.
Coffee Grounds and Tea Bags: These are compostable and add valuable nutrients to the compost.
Eggshells: Crushed eggshells can be composted and provide calcium.
Bread, Pasta, and Rice: These items are acceptable but should be added in small quantities to avoid pests.
Meat, Fish, and Bones: Many food waste bins accept these, but check local guidelines, as they require specific processing.
Dairy Products: Small amounts of cheese and yoghurt are generally acceptable.
Leftover Cooked Food: Including leftovers from meals.
Small Amounts of Paper Towels and Napkins: If they are used to wipe up food and are not heavily soiled with non-food substances.
What You Can't Put in a Food Waste Bin:
Plastic, Glass, and Metal: These materials are not compostable and should be recycled separately.
Non-Compostable Packaging: Includes plastic bags, wrappers, and containers.
Liquids: Avoid adding large amounts of liquid, such as soups or oils, as they can create a mess and attract pests.
Pet Waste: Animal waste and cat litter are not suitable for food waste bins due to potential pathogens.
Non-Food Items: Such as diapers, sanitary products, and other household waste.
Oily Foods and Grease: These can disrupt the composting process and attract pests.
Large Bones: These take a long time to break down and may not be accepted in all food waste programs.
How To Stop Pests Getting Into Your Food Waste Bin:
To prevent pests from accessing your food waste bin, follow these tips:
- Secure Lid: Always keep the lid of your food waste bin tightly closed to prevent pests like flies, rats, and foxes from getting inside.
- Clean Bin Regularly: Clean the food waste bin regularly to remove any residue or odours that may attract pests.
- Use Bin Liners: Line the food waste bin with compostable liners or newspaper to absorb moisture and reduce odours.
- Store Bin Properly: Store the food waste bin in a cool, shaded area away from direct sunlight to minimise odours and deter pests.
- Empty Regularly: Empty the food waste bin frequently, especially in warmer weather, to prevent odours from building up and attracting pests.
- Avoid Certain Foods: Avoid putting highly attractive foods like meat, fish, and dairy products directly into the food waste bin. Instead, use a sealed container or wrap them tightly before disposal.
By implementing these practices, you can effectively reduce the risk of pests accessing your food waste and maintain a cleaner environment around your home.
Tips For Keeping Your Food Bin Clean:
Cleaning your food bin regularly is essential to maintain hygiene and prevent odours and pests. Here’s a step-by-step guide to effectively clean your food bin:
- Empty the Bin: Ensure all food waste and liners are removed. Dispose of the waste properly according to your local council's guidelines.
- Rinse the Bin: Use a hose or pour water into the bin to rinse out any loose debris and initial grime. This helps to remove surface dirt and makes the scrubbing process easier.
- Scrub the Interior: Use a long-handled brush and a mixture of hot water and dish soap to scrub the inside of the bin. Pay special attention to the corners and bottom where residue can accumulate.
- Disinfect: Prepare a disinfecting solution by mixing one part bleach with nine parts water or use a household disinfectant. Apply the solution to the bin’s interior to kill bacteria and remove lingering odours. Allow it to sit for a few minutes.
- Rinse Thoroughly: After disinfecting, rinse the bin thoroughly with clean water to remove any soap or disinfectant residue.
- Dry Completely: Turn the bin upside down and allow it to dry completely before use. Drying helps prevent mould and bacteria growth. You can speed up the process by wiping it down with a clean, dry cloth.
- Clean the Lid and Exterior: Don’t forget to clean the lid and the exterior of the bin. Wipe them down with soapy water and rinse, then disinfect and dry them as well.
- Use Bin Liners: Once the bin is clean and dry, use compostable bin liners to make future cleaning easier and to help manage odours.
- Regular Maintenance: To keep the bin clean, perform this cleaning routine every few weeks, or more often if necessary, especially in warm weather to prevent odours and pest infestations.
Try At-Home Composting:
Composting at home is a rewarding way to reduce waste and enrich your garden soil. Here are some tips to get started:
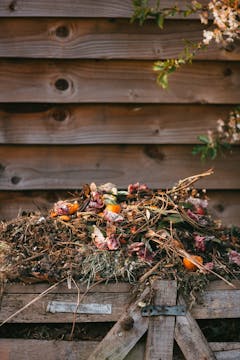
- Choose a Location: Pick a suitable spot in your garden or yard for your compost heap or bin. It should be well-drained and ideally shaded to prevent drying out.
- Bin or Pile: Decide whether you'll use a compost bin or simply create a compost pile directly on the ground. Bins can help contain the compost and control pests.
- What to Compost: You can compost fruit and vegetable scraps, coffee grounds, tea bags, eggshells, yard trimmings, and shredded paper. Avoid meat, dairy, and oily foods.
- Layering: Alternate layers of green (nitrogen-rich) and brown (carbon-rich) materials to balance the compost. Green materials include kitchen scraps and grass clippings, while brown materials include dry leaves, straw, and cardboard.
- Moisture and Aeration: Keep the compost moist like a wrung-out sponge. Turn the pile occasionally with a pitchfork or aerate it using a compost aerator to speed up decomposition.
- Patience: Composting takes time. Depending on conditions, it can take several weeks to several months for compost to be ready. It should look dark and crumbly with an earthy smell.
- Using Compost: Once ready, use compost to enrich soil in your garden beds, potting mixes, or as a mulch to retain moisture and suppress weeds.
If you’re looking for more at-home composting tips then check out our guides:

How to compost without a garden
Food waste doesn't break down in landfills. Instead, it releases the harmful greenhouse gas methane into the atmosphere. Composting reduces this environmental headache.

A beginner’s guide to composting
Home composting is a great way to make excellent soil that can be used for any gardening or houseplant project. And as decomposition within landfills generates greenhouse gases, setting up a compost at home is an easy way to reduce your environmental footprint. Here’s our advice for how to set up a compost – even if you don’t have much time or space to spare.

How to make homemade compost from your food waste
Learn how to make compost at home, without a garden! Help make a difference to the planet with this guide to making compost.

